This post is part of a series on serverless computing with AWS Lambda, but is written as a standalone introduction to AWS Lambda with Java. In this post, I’ll create a very basic function which just echos back the message that I send to it. In the next part of this series, we’ll modify the function to do something a bit more useful!
To follow along with this blog, there are a few things you’ll need to have set up first:
- An AWS account
- Java 8
- Gradle
1. Create a New Project
My function will eventually be part of a larger project to control the lights in my home, so I’ve created a Gradle Java project called LightController, with the following build.gradle:
group 'io.mikecroft.demo.homecontroller.lambda'
version '1.0-SNAPSHOT'

apply plugin: 'java'

sourceCompatibility = 1.8

repositories {
    mavenCentral()
}

dependencies {
    compile 'com.amazonaws:aws-lambda-java-core:1.1.0'
    compile 'com.amazonaws:aws-lambda-java-events:1.1.0'
}

task buildZip(type: Zip) {
    from compileJava
    from processResources
    into('lib') {
        from configurations.runtime
    }
}

build.dependsOn buildZip
The key parts to this are the two dependencies on the AWS Lambda SDK for Java and the task to build the compiled code into a zip distribution. When creating a Lambda function with Java, AWS expects your code to be uploaded as a Zip distribution, so the output of this task is what we’ll upload to the dashboard later.
2. Create the LightController Class
Next, we need a class to handle incoming requests to the function. For this, we will need to implement the RequestHandler interface and override the handleRequest(Object input, Context context) method as shown:
package io.mikecroft.demo.homecontroller.lambda;

import com.amazonaws.services.lambda.runtime.Context;
import com.amazonaws.services.lambda.runtime.RequestHandler;

public class LightController implements RequestHandler {

    @Override
    public String handleRequest(Object input, Context context) {
        return "Received message: " + input;
    }
}
All we’re doing here is echoing the input back to the user to confirm that we’ve received the message and and then act on it. We’ll use later blogs to do more interesting things.
3. Create the Function in the AWS Dashboard
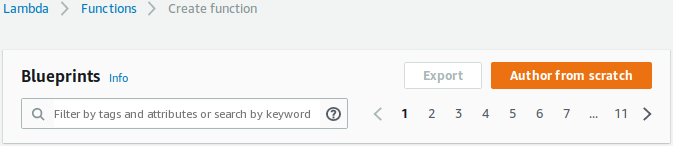
To create our function, go to the Lambda dashboard and click “Create Function” and “Author from scratch”
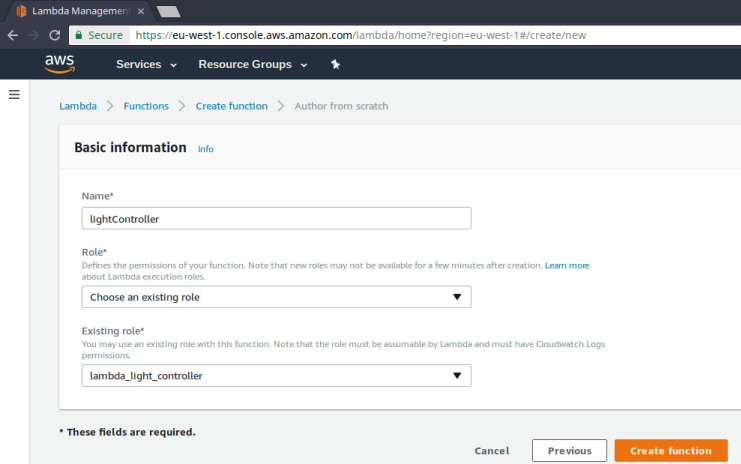
You will then need to choose a name for your function - LightController in my case - and assign an IAM role. For our purposes, it’s easiest to just create a new one, so click “Create a custom role” in the dropdown and you will automatically be taken to an IAM role creation page:
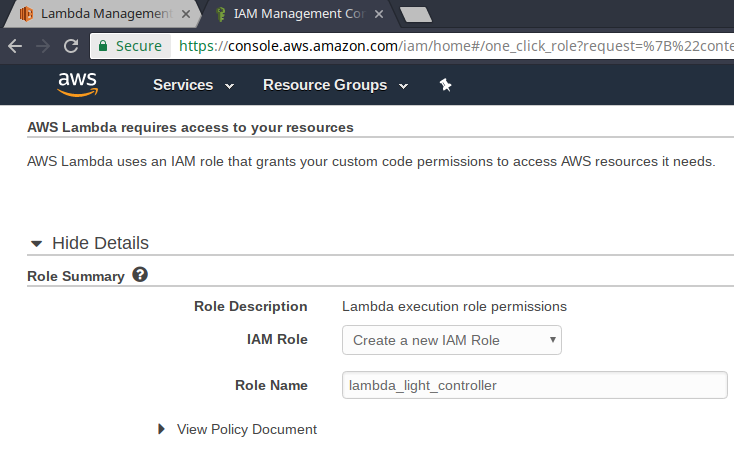
Add a sensible name and click “Allow”. You should then return to the function creation page and be able to select your new role:
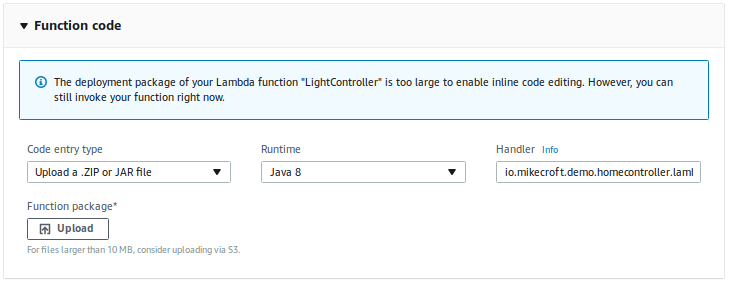
Now, we have an empty function ready for us to upload the zip file from the gradle build and add a fully qualified method reference to our handler method in the field provided:
io.mikecroft.demo.homecontroller.lambda.LightController::handleRequest
Once that’s done, all that’s left is to test the function to prove it works!
4. Test the function
First, we need to create a new test. Click the orange “Test” button in the top right corner and you will be shown a “Hello World” template with some sample data in:
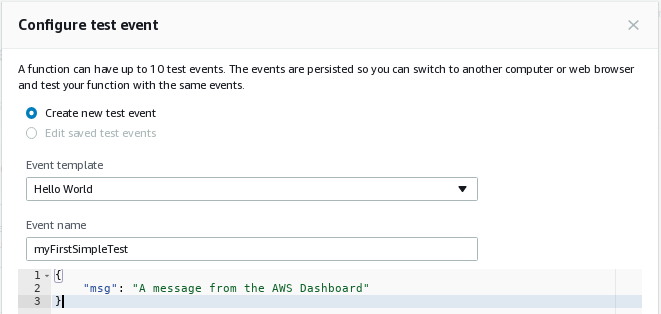
After adding our own message and clicking “Save”, we can now execute this same test whenever we want from the dashboard. If everything is configured correctly, you should see a success message similar to the one below:
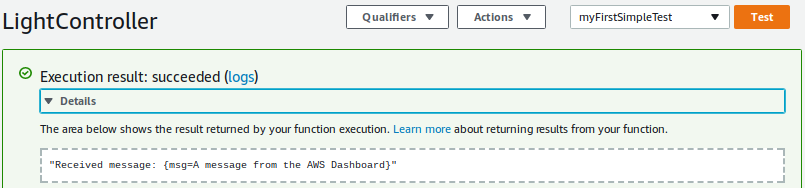
Note that the white area shows the output of our function, so we’ve proved it works! Now we’re sure of the basics, we can build more complex flows on top!
5. Improve the Workflow
Before we move on there is, of course, a plugin available for Gradle to speed up the deployment of Lambda functions. It requires some preconfiguration, though, since AWS credentials are sensitive and we don’t want them in our build scripts.
The first thing is to create an AWS Credentials file (~/.aws/credentials or ~/.aws/config) to store the AWS access key and secret key pair used to authenticate with AWS. This is a pretty important step, and it’s worthwhile checking any existing credentials if you have already got one set up, since you may not be using the account you think you are.
The plugin is provided by ClassMethod and available on GitHub and in Gradle’s plugins repository. To use it, I made a few small changes to my build.gradle with a few extra imports, a definition of the Gradle repository and a dependency on the plugin itself:
import com.amazonaws.services.lambda.model.InvocationType
import com.amazonaws.services.lambda.model.Runtime
import jp.classmethod.aws.gradle.lambda.AWSLambdaInvokeTask
import jp.classmethod.aws.gradle.lambda.AWSLambdaMigrateFunctionTask

buildscript {
    repositories {
        mavenCentral()
        maven { url "https://plugins.gradle.org/m2/" }
    }
    dependencies {
        classpath "jp.classmethod.aws:gradle-aws-plugin:0.22"
    }
}
Once we have the plugin available, we can make use of it. Using the profile configured in the AWS credentials file, we can configure the plugin to only use the correct AWS account and region. This is especially useful if you, like many people, have separate AWS accounts for development and production. We can make sure to avoid affecting production by accident by naming the profile, though I only have a single account available so I’m using the name “default”
// Gradle AWS Plugin
aws {
    profileName = "default"
    region = "eu-west-1"
}
Also specified here is the region. It should be possible to set the region in an ~/.aws/config file, but I found that this did not work. Directly configuring the plugin like I have done here works very well, though.
Next, we can create a couple of Gradle tasks. Here, I’ve created a deploy task and an invoke task:
task deploy(type: AWSLambdaMigrateFunctionTask, dependsOn: build) {
    functionName = "LightController"
    handler = "io.mikecroft.demo.homecontroller.lambda.LightController::handleRequest"
    role = "arn:aws:iam::${aws.accountId}:role/lambda_light_controller"
    runtime = Runtime.Java8
    zipFile = buildZip.archivePath
    memorySize = 128
    timeout = 10
}
The configuration of the task reflects exactly the fields available through the web console.
task invoke(type: AWSLambdaInvokeTask) {
    functionName = "LightController"
    invocationType = InvocationType.RequestResponse
    payload = '{ "msg": "A message from Gradle"}'
    doLast {
        println "Lambda function result: " + new String(invokeResult.payload.array(), "UTF-8")
    }
}
Finally, the invoke task has just been configured here to test with a payload that clearly comes from Gradle rather than the web UI.
Now, we can build, deploy and test our function with just a single command:
➜  AWSLambdaSQSDemo git:(master) gradle clean build deploy invoke -b LightController/build.gradle
:clean
:compileJava
:processResources NO-SOURCE
:classes
:jar
:assemble
:buildZip
:compileTestJava NO-SOURCE
:processTestResources NO-SOURCE
:testClasses UP-TO-DATE
:test NO-SOURCE
:check UP-TO-DATE
:build
:deploy
:invoke
Lambda function result: "Received message: {msg=A message from Gradle}"

BUILD SUCCESSFUL

Total time: 37.2 secs
The really nice thing about the plugin is that, once you are familiar with AWS Lambda, you can completely ignore the web interface since the deploy task will create the function if it does not already exist. Neat!
The next step will be to modify the function to send a message to an SQS queue!
